Saturday, November 3, 2012

The weekend is here and I have some fabric from Mood NYC

Fabric from Mood in NYC.....

Yes, I did it, I went to the Mood website and ordered some fabric.  It had to be shipped to my mom in Arizona and then sent to me since shipping to Alaska was unbelievably expensive.  I had canceled the order when I saw the shipping cost but then grew so sad that I ordered it again and went with shipping to Alaska via Arizona (Thanks Mom!)

One piece is wool that is chocolate brown on one side and black on the other.  It is a medium weight wool and incredibly soft.  This created the most wonderful opportunity to get creative.  I decided to make a long reversible coat with a modified flat felled seam.  It is a slow process but it goes something like this:


Baste a stitching line along all of the seam allowances.  Overlap the pieces together so there will be one side of the seam allowance on the top and the other on the bottom.  Then press them in opposite directions so that the black lays against the brown, and vice-versa on the other side.  Turn under the seam allowance, carefully pin and top stitch.

It is a little tricky to get everything even and straight but with each seam, I am getting a better technique.  Which is good because the curved bodice is my next seam.

I will add another photo when a few more pieces are put together...unless it is a disaster.  Then I will post the cute small jacket that I will make from the scraps--no!!

Thursday, August 9, 2012

Fierce Mural on the Gym Wall


 The Fierce Mural on the Gym Wall


 The project of the day... a mural on the gym wall.  The design was created by Gene at Lifeasrx.  It was a design for our gym t-shirt, but the design was so fierce, we had to paint it on the gym wall.


We projected the design on the wall, traced it with chalk and then painted it.  Sage and Joe helped with the painting.  Sage painted the salmon and Joe reached all of the high places.


The design includes the ten areas that we practice and improve on as we workout at the gym:  

  • speed
  • agility
  • accuracy
  • balance
  • coordination
  • endurance
  • stamina
  • power
  • flexibility
  • strength

Quick Crochet Felted Hats

Warm Winter Hats

I have been making these simple little hats during the last year.  I crochet them in whatever colors occur to me.   When I am done, I throw them in the wash and felt them.


These hats are really thick, thanks to the wool yarn and the fact that they are crocheted instead of knitted.  


Here is a quick description of my pattern:

Change colors when you feel like it.  ;-)


 These MUST be made with 100% wool yarn.  Check the package to be certain.   I use a size I9/5.5 hook.

 Row 1:  Make a magic circle with 6 single crochet. Mark the start.  Slip stitch last crochet to the first then chain one to "step up" for next row.

Row 2:  2 stitches in each sc for entire row.  (12 stitches).  Slip stitch last crochet to first then chain one to "step up" for next row.

Row 3: (sc, inc stitch) entire row.  Every other stitch is increased.  Slip stitch and chain one.

Row 4: (sc, sc, inc) entire row,  slip stitch and chain one.

Row 5: (sc, sc, sc, inc) entire row, slip stitch and chain one.

Row 6: (sc, sc, sc, sc, inc) entire row, slip stitch and chain one.


 The pattern continues with one more sc added to the sequence with each row.  Increase in this manner until you have 15 rows.  The diameter should be about 8 inches.


At this point, simply single crochet each row, with a slip stitch and chain at the end of each row.  

Continue in this manner for 6 inches.  

Final Step:

Place the hat in the washing machine with soap and hot water.  Agitate, checking often to determine the correct size.  Have a tape measure ready to measure the circumference.  Measure your head circumference and divide it in half.  Then, pull out the hat and flatten it to measure the lower edge.  Toss it back in the wash until it reaches your size.  Then rinse it gently in cold water and shape it for drying.  I stuff it with a towel in the shape of a head for drying.


Happy Hat Making!


Saturday, August 4, 2012

So many scraps, what to do?????

How to make the skirts that I have in my shop on etsy.

http://www.etsy.com/shop/AthenasThreads
The bottom drawer of my dresser was full of wool and wool blends, left over from making pants or jackets for school.  Some of the wool was given to me through the years as well.  So....I needed a skirt for my uncle's funeral and decided to stay true to my Riva roots (which would please Uncle Harold) and make a skirt from scraps.  This had an added special-ness since my Aunt Donna taught me how to sew in 4-H when I was in 4th grade.

I cut strips of fabric, each 22 inches long and between 3 and 4.5 inches wide.  I made sure the strips followed the grain, a very important factor in the success of the skirt.

I serged the strips together, always starting 5/8 inch seam allowance and tapering to 3/8 inch within 3 inches of the top edge.  In other words, I just took a "smidge" off each strip at the waist, this helped with fitting later.

After I had sewn enough strips to go around me and with an overlap in the front, I was ready to fit the skirt.  I overlapped the front from hip bone to hip bone.  Putting the skirt on my dressform, wrong side out, I pinned the strips to taper at the waist, then stitched the strips as pinned.

Once the fit was correct, I layed out the skirt on a large piece of paper to trace the shape of the waist for a facing.  I traced the shape along the top of the skirt, then used my ruler to draw the pattern piece for the waist facing 3 inches wide.  I put interfacing on the wrong side of the facing. I sewed it to the waist, right sides together, understitching along the original seam.

I wanted fringe on the edge, so I sewed a line 1/2 inch from the edge of the skirt and pulled the threads loose.

I hemmed the skirt with hem tape and hand stitched the hem.


Finally, I put a snap on the inside overlap (right hip)  and two dress hooks on the upper overlap (left hip).


Voila!  A fitted pencil skirt, very professional and fun.

These skirts are being sold in my shop on etsy.   http://www.etsy.com/shop/AthenasThreads

Monday, June 18, 2012

Summer Project #2: Bracelets!!!!

Bracelets Galore!!!!
So I found lots of beads and old jewelry while cleaning my sewing room so I decided to make bracelets.  At first, I strung them and attached them to clasps, but then I discovered some memory wire.  That stuff is great!  Just fold over the end with a pair of pliers and finish with a little clamp, then string away!  I think that three loops around is good.  I made sets of bracelets that can be worn together or separately.  Here are some of my creations with memory wire.  http://www.etsy.com/shop/AthenasThreads


Random beads look nice together!
Fabric ribbon bracelet with bow
Large glass beads 

Love the colors!

This light blue bracelet has two separate wires.

Monday, June 11, 2012


 My sewing room is done and I love it!!!!!   I finished the closet organizer and then painted all of the shelves and table top a bright, glossy white. I painted all of my flat, wood boxes turquoise.  Our local True Value had cloth boxes that fit perfectly in the big cubbies.

My closet is full but organized.  I can find my stuff and now I can START SEWING!!!!!

My first project, a mod knit dress with a turquoise skirt.

HAPPY, HAPPY, HAPPY, HAPPY!

Tuesday, June 5, 2012

Summer Project #1


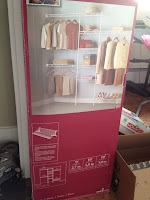
First day of summer vacation for me.  I already painted my sewing room closet turquoise.  Next step: the assembly and installation of a closet organizer.  I hope I can pull it off without doing something stupid.  I have an internal rebel that refuses to follow directions, certain that I can improve on anything.  I have ruined many recipes because of that damn little rebel.  Today, I will look at the picture and try, try, try to make it match but even as I type this a thought crosses my mind "I don't need that silly shoe rack, I will install it without the slant and make another shelf".  So much for following directions.